These are the chronicles of two Shetland Sheepdogs and their adventures in rally-o, obedience, flyball, agility, tracking and therapy dog work.
Also including information on raw feeding, canine epilepsy, positive training, and lots and lots of Sheltie hair!


Showing posts with label Grooming. Show all posts

Saturday, November 28, 2009

Big Boy Coat!

This afternoon I spent up to my elbows in the tedious job of petting puppies. I evaluated a bunch of prospective therapy dog teams ... and am proud to offer congratulations to 8 new St. John Ambulance Therapy Dog teams in Saskatoon and area! Wonderful job, everyone! Fantastic dogs that, I am sure, will be bringing smiles to many faces very soon.

This evening, I was again up to my elbows in puppy fluff ... this time bathing my own dogs. Yes, it is that time of year again. I've heard rumor that some cities in the South of the province have been getting snow the past day or two, so it is likely headed up this way soon. Can't complain, really. We are normally snowed in by the end of October. But, regardless of when it comes, the "before the snow flies" bath must happen. I don't like bathing the dogs when there is snow on the ground as it is usually SO cold and the boys take SO long to dry, outdoor potty breaks pose a serious risk for pup-cicles.

Neither dog is amused by baths. Gio toughs it out like a man. Where Romeo follows the "passive resistance" route ... hanging his head down so that the water runs over his face as if to say "You try to bath me? FINE, I'll just DROWN myself then!" Yeah, he's full of drama like that.

What I noticed during the bathtime, though, really shocked me. Romeo definitely has his big-boy coat now! I've noticed he's been filling out these past couple of months. As you have probably seen in recent pictures, that fur really gets flying. But I guess I never really noticed how much hair he has until it is all slicked down by water and I'm trying to part it to get the suds out from his undercoat. It's NUTS! He definitely got his dam's coat, it's HUGE! I attack it with the FURminator, Coat King, and traditional slicker ... and can't even make a dent. None of my other Shelties, past or present, have had this much coat.

In other news, thanks to everyone that offered words of sympathy for my ankle. It is getting better. I can walk *almost* normally on it. The worst part is the random and sporadic muscle twitches. They come up out of no where and hit like a jolt of lightening! HOLY FRICK! But the bruise is really sexy, currently lovely shades of maroon and pea-soup green. Yeah, I know, you're jealous. And who doesn't love the artificial club foot look due to copious amounts of tensor wrap?

And, because I greatly dislike a blog post without pictures, here are some pictures from a few days ago of the dogs eating FREE trout.

"Mmmm Trout-y goodness"

Gio does not like trout.
"I only eat this because I like to uphold the image that I am starving to death."
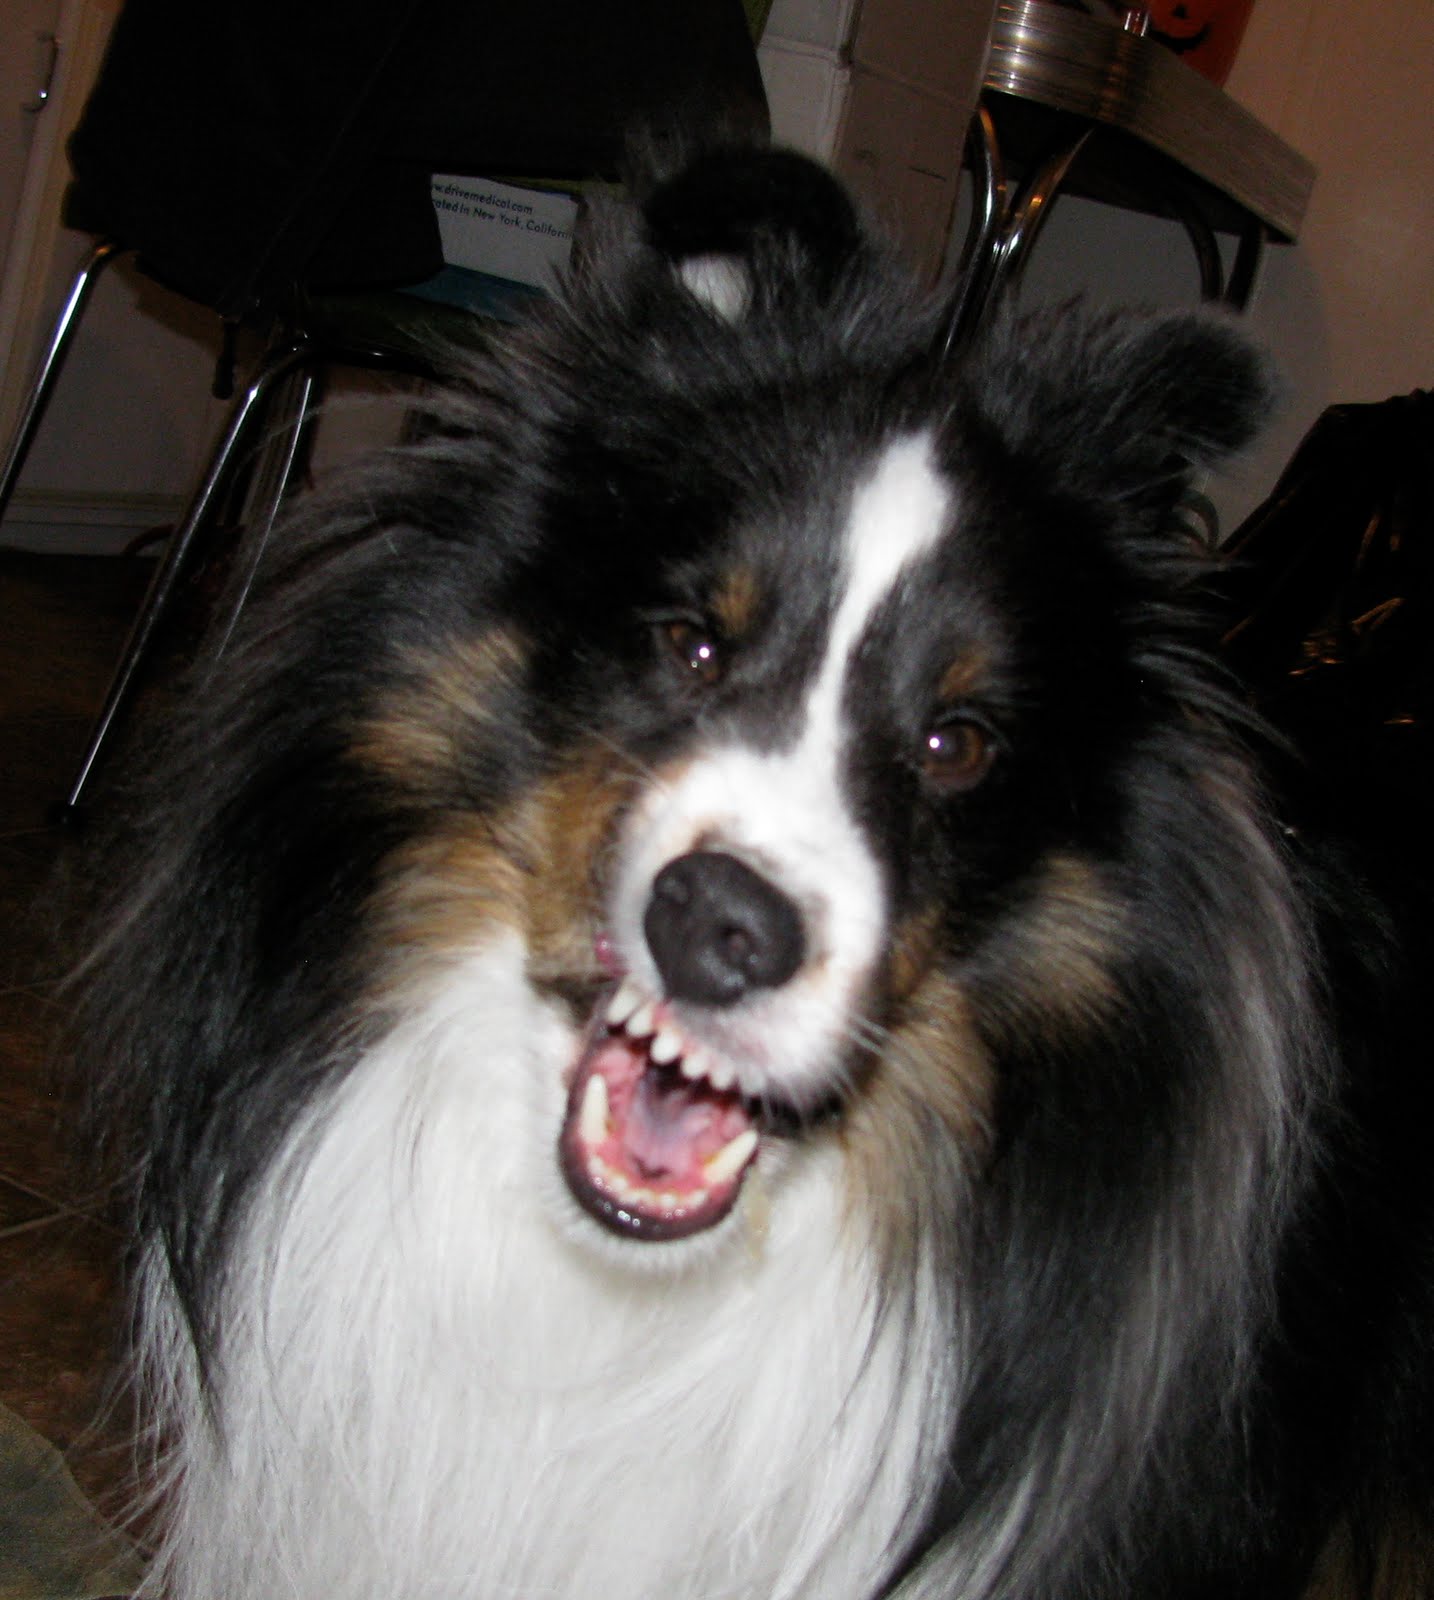
"I DO! I like trout! I'll have his portion, too!"

Have I mentioned that Romeo is a weirdo?

Friday, June 5, 2009

FURminator ... continued

After yesterday's blog post, I received a couple of questions on how to use the FURminator, specifically with Sheltie-type coats.

Using the FURminator does take some practice. I have made Gio's butt nearly bald when I first used it. It was a situation where I was so amazed at how much hair I was getting out, that I just kept going ... and going ... and going. Poor Gio. But it grew back in, no problems. I go off of feel a lot when FURminatoring (new verb!). If the tool glides through easily, then keep going. As soon as it starts to feel choppy or rough, stop. You've got all the undercoat you are going to get.

I line brush when I use the FURminator. Meaning that I part the hair down to the skin, and work at the very base of the hair with the FURminator. Short strokes just to loosen the hair, then use a slicker brush to pull the hair out. I find that if I try to pull the FURminator right from the base of the hair to the tip that it ends up breaking some of the guard coat. By line brushing and just working the base of the hair, the guard hairs remain undamaged and you only remove the undercoat.

Another thing to keep in mind, is to not work on one area for too long. I only do about 5-7 strokes per "piece of skin", and not pressing down overly hard. The teeth of the FURminator are quite sharp (comparatively), and can damage the skin if you work one area too much.

When introducing the FURminator to your dog, I find it easiest to just do a small patch at a time. When I started, I did 1/4 of a dog per session, one session per day. As I got used to using the FURminator and the dogs began to accept it well, I would increase the area I would groom. Now I can do a whole dog in one session, usually with a break half way through to stretch my back and let the dog wander around for a minute.

I can completely strip the undercoat of both of my dogs in about an hour and a half. I try to do this about once a month in the summer time, slightly less often in the winter. In the summer, I try to get as much undercoat out as I can. In the winter, I use the FURminator sparingly, only thinning out areas, not removing the undercoat completely.

Here is a brief video of how I use the FURminator. Keep in mind that the boys were just stripped yesterday, so there isn't much undercoat for me to remove as a demo. I jumped around a lot trying to find a good place with some undercoat left. Normally I would move very systematically from the hindend of the dog to the shoulder.


And no, the FURminator people are not paying me. Though, if any FURminator people are reading this, I would be happy to accept "thank you" presents! Have your people call my people.

Thursday, June 4, 2009

Spring Cleaning

I admit it, I have been slacking off in the grooming department. My excuses? Well, with Gio being ill he hasn't been going on his therapy dog visits, so I haven't been as diligent with feet trimming and grooming as I normally am. And Romeo, well I really don't have an excuse, except for the fact that stripping him out is such a daunting task I prefer to ignore it most of the time.

But I finally broke down and decided that a good stripping and brush out was long over due.

Which leads me to this very important declaration ...

PEOPLE OF THE WORLD ... I LOVE MY FURMINATOR!!


I believe I was able to strip 2.38 Miniature Poodles out of my two boys.

Proof? You want proof? YOU CAN'T HANDLE THE PROOF!!

(ahem ... sorry ... moving on)


Tuesday, December 2, 2008

Holidays

Because of my "big day" last week, I decided to take a couple of days off of work this week. Mainly just to allow my sanity to catch back up with me, and to allow myself to catch up on all the things I have been neglecting this past while.

Yesterday was spent Christmas shopping and running errands. Today was all about the boys! Last week I received an e-mail saying that Romeo's St. John Ambulance therapy dog bandanna and certificate had arrived at the Saskatoon main office. There was also a request that I bring the boys by for a visit when I stopped in to pick it up. So I loaded the boys in the car this afternoon and headed over to the SJA office on Broadway. They had a good visit with the nice ladies that work in the office.

That is where the fun ended for the boys, at least temporarily. Next, was bath time. The dreaded quarterly bath. The boys were both getting very dirty, stinky and grey. Gio is a sucker for ear scratches, so after he cons everyone he meets into rubbing his ears, they tend to get a little greasy. And well, Romeo is just a pig. Especially now that our agility classes are being held in a horse arena on some sort of dirt/rubber/horse manure combo on the ground. Great for running on, but messy as all heck!

So I took the boys by Vaganza's for a "U-Groom". I know I have mentioned it before, but I really do love the U-Groom option at Vaganza's! You get to use their raised tubs, high velocity drier, and grooming tables, plus all the shampoo, conditioner, whitener, detangler, and Pet Silk that you want! All for a very reasonable price.

Neither of the boys like bath days, but they tolerate it. They are both getting much better at accepting the high velocity drier. Romeo doesn't even raise a fuss until I get near his head. Gio's tolerance for the drier is more related to time than location. He will calmly accept the drier for about 5-7 minutes ... after that, it is war. I'm getting pretty good at the drier thing, though, so I am now able to work around the boy's tolerance levels and get them "mostly" dry. Usually just the ears and a little bit around their neck remains wet when we are done. I can live with that. Then a little bit of Pet Silk and they are poofy and fluffy, all ready to go! Whites white, and blacks shiny. At home, I tidied up their feet (it was long over-due). Of course, ending it all off with a nice cookie.

I can tell that the boys feel much better after their baths. They are both quite fiesty now, Gio especially, harassing Romeo into play wrestling with him. Romeo is just happy to bounce and spin everywhere like a maniac.

I've got a couple of more little things to do before it's back to work tomorrow. I finished up all of my Christmas cards, tidied up my office area a bit, now just need to update my 4-month calendar (without that calendar I am completely lost).

Back to work tomorrow. It seems so much more tolerable now that the "school" part of it is finished!

Monday, November 24, 2008

Winter Care for Dog Paws

During the winter months, there are hazards to our dogs as they venture outdoors. The area of the body that seems to feel the cold the most is the paws. Even just playing out in the yard or at the park can result in snow balling up and freezing to the paws causing pain and discomfort to the dog. There are a number of steps that you can take to ensure you keep those paws as warm as possible.

Firstly, proper paw maintenance. Be sure to trim the hair on the bottom of the paws and between the toes to prevent snow from clumping and freezing. There is a misconception that leaving the paw hair long will provide natural insulation against the cold, but this is incorrect. Long paw hair allows snow to clump, where if the hair is trimmed there is a lesser chance for snow to ball up and cling. Check out a previous article for instructions on one method of paw trimming: Grooming Those Sheltie Feet.

There are also many items available to help keep the snow off of the paws. The most common is likely booties. There are many styles of booties to choose from, all with varying price tags. I have not had success with booties, they never seem to stay on properly, and if they do then it alters the way that the dog walks and their ability to get grip on slippery surfaces. Instead, I prefer products such as Musher's Secret Paw Wax. This stuff is amazing! It is roughly the consistency of firm Vaseline. Smear a thin layer on the bottom of the paws and between the toes and it forms a waterproof breathable layer that keeps the moisture away from the paws, prevents snow from clinging and balling up, and also blocks against road salts and chemicals. Road salt and chemicals can burn and irritate the skin, as well as cause serious health problems if ingested after the dog licks their paws. Musher's Secret keeps the chemicals away from the skin, then a quick wipe of the feet before re-entering the house clears them away completely. The wax is not overly greasy, I haven't had any issues with it staining carpet or furniture. Though on indoor flooring, it can be a little slippery so be sure to wipe the feet when coming back indoors.

Be sure to also monitor your dogs while outside. Take cues from them as to when it is too cold. Your first sign will likely be if the dog is holding their paws up out of the snow, also reluctance to walk or play or constant running back to the door signals time to go back indoors and warm up. My rule of thumb, if the dogs are playing hard with no sign of discomfort, then there is no need to worry. Watch the body language of your dogs, they can't tell you verbally when they are cold, so you need to be an honest judge.

Once back inside, check the dog over for hidden ice clumps. Chest/neck hair, armpits, inner thigh, and up the legs are common "clump" areas. If you do find clumps, use a dry towel to melt the clumps enough to gently remove them from the fur. Some dogs enjoy chewing the clumps off themselves, but allowing that risks the dog breaking or damaging the hair itself and may irritate the skin. It's better, then, to help your dog out and melt the clumps with a dry towel.

Enjoy the Snow!

Tuesday, November 11, 2008

Puppy Pedicure

I've been a little slack on trimming the boy's feet lately. Normally I will trim their paw hair once a week or so, just to keep things neat and tidy. But I haven't now for about 3 weeks. I know, I'm so negligent!

Tomorrow night Gio is working a St. John Ambulance volunteer open house, so it is definitely time to trim the feet. And this coming weekend, both boys are entered in a Rally-O trial in Regina, and I always like to have them spiffed up for public performances. All of that means that tonight was Foot Night! Since their feet were so dirty and so unkempt, I decided we might as well take advantage of the Foot Night and get those paws nice and messy. What better way to get feet dirty than to pull out a couple of big, bloody RMBs!

YUM! Beef was on the menu tonight, thanks again to my boss for providing the goodies for the boys.

Gio's RMB method ... Dig right in and squish that meat really deep between your toes. Be sure to smear it all up your legs, too.


Romeo's RMB method ... Utilize your contortionist abilities in attempts to avoid getting your paws messy. Then realize that your big brother is beating you at the RMB carnage and resort to ysing your paws.


"Um ... Gio? ... Your tail is touching my snack."

The result ... Very messy feet!


After a foot-bath and some clipping and trimming, the paws are sparkly white and cute again!

Friday, September 12, 2008

Holy Hobbit-Feet, Batman!

SOMEONE has been slacking off and some certain puppy feet got very fluffy!

*SHAME SHAME!*


As I am feeling a little "Stacy London" today, here is my little homage to the always entertaining before and after make-over shows. (aside: Who knew Stacy London has a Wikipedia page? I want a Wikipedia page! Nothing says "Nearly-accurate-pseudo-truth-errors-of-omission-don't-count-as-lies" like Wikipedia!)

BEFORE
"Darling! No! No no no! LOOK what you have done to the shape of your feet! Do you see that? All that extra POOF makes your legs look short and stubby. You're a purebred? Honey, with feet like that I wouldn't even call you a hybrid!*"

AFTER

"SHUT UP! You look HOT! The cut flatters your figure perfectly. And LOOK at those toes!"

Yes, I realize that Gio's toe nails are too long. Dog toe nails should not be that long, so don't take that as an example of how to keep toe nails. His quicks grow insanely fast, and even with cutting his nails every 3 days, it is taking forever to get them back to where they should be.

In an unrelated story, rice crackers make Romeo turn into a savage beast.

It starts out innocent enough.
"Mama, please may I have some rice cracker?"

One given a small taste of rice cracker, the beast within stirs ...

And before you know it, you have a full-fledged Werewolf on your hands!^

Gio, on the other hand, believes chewing is for losers.
"Chewing takes up precious swallowing time"


* Note, comments made in this blog post are for the purposes of entertainment only. I hold no dislike towards mixed breed dogs. It was a joke, just laugh already. As for "hybrids", you're not fooling anyone. Love your dog for that wonderful mutt that it is. You don't need a fancy name for the type of dog that you have. Your dog is special because you love it as much as you do. You don't need any more than that.

^ ETA: Concern has been expressed from "Grandma" about how I got Romeo to bare his teeth. That is actually how he chews rice crackers. I have never seen him chew anything else in that manner, but apparently the hard rice crackers require full gum exposure. So not to worry, wee Romeo was not tormented or manipulated in any way to get him to be vicious. Rather, I just had to find the right food and TA-DA "Insta-Beastie"!

Tuesday, August 26, 2008

Trimming Sheltie Ears

Here is yet another "How To" for Sheltie grooming. Or rather than calling it a "How To" and implying that it is the only way to groom a Sheltie, let's call it a "How I Do It". I realize there may be different ways to trim these hairy beasties, but these are the methods that I use.

The ears are tricky to get right, and take quite a bit of practice. The first couple of times I tried to tackle Romeo's ears, I ended up eye-balling them for days afterwards, attacking them with the thinning shears a couple more times to even things out, balance them, and smooth out corners that I never intended to put there in the first place. As such, I always like to trim the ears a couple of days before they need to be looking their best. For example, both boys are entered in a big obedience and rally-o trial this coming weekend. I planned to do the ears tonight, so that I have the next couple of days to tidy them up a bit before they need to be on display in the trial rings.

Another note, this trimming technique gets best results on tipped ears. Some Shelties, my Gio included, have prick ears that stand straight up. I tried this method on him once and it just didn't look right. I find that on Shelties with pricked ears, the fly-away scruffy look tends to look better. If you start trimming and trying to tidy things up, then it just emphasizes the size of their ears. So I only trim Romeo's ears as they are tipped very nicely.

For this task, you will need:

- a pair of thinning shears (you can purchase professional groomer thinning shears for upwards of $100, or you can pick up a pair from your favorite drug store for about $15)
- a fine toothed metal comb
- a small pair of blunt nosed scissors


Step 1
- Comb through the hair on the back of the ear completely to remove any snaggles or mats. Once the hair is smooth, place the teeth of the comb at the base of the ear and comb straight upwards towards the tip of the ear, holding the hair to the back of the ear with your finger. It may take a few swipes to get all the hair from the back of the ear gathered. Be sure to only gather the hair that is attached to the ear itself, don't take hair from the back of the dog's head or neck.


Step 2
- Using the shape of the ear as a guide, use the thinning shears to trim the hair that sticks outside of the shape of the ear. It is a good idea to do this in a couple of steps. Trim a bit, then comb the hair back up from the base of the ear again so that you do not miss any. Start trimming on the outside edge of the ear, and then on the inside edge. In the picture to the left, I am still holding all of the combed hair to the back of the ear, but all the hair that protrudes outside of the shape of the ear has been trimmed off.


Step 3
- Hold the edge of the ear between your thumb and forefinger so that you can feel the edge of the ear under your fingertips. With the blunt nosed scissors, CAREFULLY trim around the edge of the ear in a smooth curve that follows the top edge of the ear.


Step 4
- Repeat steps 1-3 with the other ear. Then take a step back and look at both ears. Compare to see if they are the same shape and evenly weighted by encouraging your dog to prick his ears up (time to make funny noises!). Trim with the thinning shears as needed. I prefer to leave the hair in the front of the ear intact, though if there are any great long fly-aways, I will trim them a little bit shorter so that they stay within the overall shape of the ear.


Other entries that I have written on how I groom my Shelties:
Grooming those Sheltie feet
Trimming Sheltie leg feathers and hocks
Trimming Sheltie ears
Homemade snood to prevent messy, broken hair

Trimming Sheltie Leg Feathers and Hocks

As requested, here is a step-by-step guide to how I trim my Shelties' front leg feathers and hocks. The technique for the front legs was taught to me by Romeo's breeder (Thanks Brenda!). The technique for the hocks, I figured out on my own and am happy with the results. (Please excuse the messy feet. "Foot Trimming Day" is on Thursday.)

Again, following my normal pattern, I prefer to keep these things cheap and easy, no fancy equipment if I can avoid it. For the whole process, you will need:

- a small slicker brush
- a fine toothed metal comb
- a small pair of blunt nosed scissors
- a small battery operated razor with adjustable guide (I prefer to use a woman's personal hygiene razor that you can get at any drug store for around $20).


Front Leg Feathers

Step 1
- With the fine toothed comb, comb through the hair on the back of the front leg, from "elbow" to "wrist", gathering it flat along the leg. Hold it in place with your thumb located just above the dog's "thumb pad" located on the back of their wrist.


Step 2
- With the blunt nosed scissors, cut the hair that is hanging below the dog's "thumb pad" straight across.


Step 3
- With the scissors or the razor (whichever you are more comfortable with) cut the hair between the dog's "thumb pad" and the large paw pad so that it is as short as the hair on the front of the leg.


All done! By gathering the hair from the elbow down to the wrist and then cutting it all straight across, you will wind up with a really nice taper from top to bottom. And by using the thumb pad as a guide on both legs, it ensures that you will wind up with an even job on both sides.


Hocks (Back Legs)

Step 1
- With the slicker brush, brush the hair on the back of the hocks UP from the paw to the point of the hock so that all the hair is standing up and away from the leg.


Step 2
- Set the battery operated razor to the longest setting, approximately 0.5" (just over 1 cm). Moving from paw to the point of the hock, run the razor up the back of the dog's leg using the back of the leg as a guide.


I find that the leg hair (front and back) doesn't grow as quickly as paw hair. So while I trim paw hair once a week, I only do the leg hair every 2 months, or when it starts to look scruffy.


Other entries that I have written on how I groom my Shelties:
Grooming those Sheltie feet
Trimming Sheltie leg feathers and hocks
Trimming Sheltie ears
Homemade snood to prevent messy, broken hair

Saturday, August 23, 2008

Bath Time!

The boys get a bath about 3-4 times a year, give or take. Today was one of those times.

With the "big show" coming up next weekend and winter weather quickly approaching (*shudder*), I thought this was as good a time as any. I take them to a locally owned business called Vaganza's that offers a decently priced U-Groom. Take your dogs in and for a small fee you get to use their raised tubs, grooming tables, forced air dryers, and all the shampoo, conditioner, whitener, and towels you want. Top it off with a slick of PetSilk and a cookie and we're homeward bound!

The boys don't like it very much, but I love the convenience of it all. Plus the raised tubs are much easier on the back and I don't have to do any big clean-up afterwards.

Some wet dogs ... scrawny beasts!


And some sudsy puppies!


After a spritz with some leave in conditioner and a good blow out, they are fluffy, soft and shiny!

Zoomies ensue as soon as we get home, up and down the hallway a couple dozen times. Now both are currently curled up on the bed for a nap ... it's a lot of work being handsome!

Thursday, August 21, 2008

Romeo's Haircut


Oh the woes of a long haired dog!

Anyone with a long coated breed will likely understand what happened here. A couple of days ago, Romeo was merrily chewing away on supper of a raw turkey wing. With all the enthusiasm of Cujo, he tends to get a wee bit messy. As the boys finished up their meal, I got the usual wet paper towels ready for the post-meal wipe-down of their face, chest, paws, and doG knows what else. Gio tears into meals with gusto, wearing goobery bits of meat and smears of blood on his paws and up his legs like medals of valor. Romeo is just as ambitious, but somewhat tidier. He prefers not to get his feet messy, so opts to flatten his meals to the ground with his chest.

In the past, tired of picking slimy bits of whatever out of his chest fluff, I fashioned a makeshift "body snood" out of an old T-shirt.

Some of you may be familiar with snoods and their use with floppy/hairy eared dogs, like Afghan Hounds or Bearded Collies. It's essentially a loose tube of fabric with elastic around each end that, when slipped over the dog's head, will hold back their hair and ears so they don't get wet or dirty while eating or drinking.

Romeo doesn't have the long floppy ear issue, so the "head hair" isn't the problem. The problem was with his ruff and chest fluff. Hence the need for a "body snood".

I had been neglecting using the body snood for the past while, Romeo was getting better at using his feet and not squishing the raw goodness into his chest hair. But a couple of days ago I found a new reason for the body snood, and it will be re-emerging from the cupboard for another chance in the spotlight.

When I went to wipe Romeo off after his turkey dinner, I noticed that the black hair around his face that falls low onto his chest seemed to be shorter on one side than the other. Sure enough, while reveling in the turkey wonderfulness, Romeo succeeded in chewing some of his hair off. By now, it is probably residing in the back yard, fodder for bird nests or mouse beds. In the picture below, note that the hair on the right side is quite a bit shorter and relatively straight across as compared to the hair on the left!


I thought this would be a good opportunity to share how I made my "body snood" so that maybe others can avoid the fashion faux "paw" of uneven hair!

Start with a T-shirt that has a sleeve that will fit snuggly over the dog's head. Laying the shirt out flat, cut the front and back pieces straight down from about the center of the collar, stopping about 3 inches from the bottom edge. Turn 90-degrees and cut straight out to the side seam, leaving a strip across the bottom. Cut along the side seam to sever the strip into two.


If you "open" the shirt up, it will look something like this ...


To put the snood on the dog, slip the sleeve over the dog's head so that the side seam of the shirt runs down their chest and between their front legs. The two strips will loop up from under the chest over the back, behind the dog's front legs. Tie them snuggle enough so that it stays put.

The "happy" snood model ...

"This look means, 'I hate you.'"

And the body snood in action ...


Enjoy!

Thursday, August 14, 2008

Grooming Those Sheltie Feet

I have a bit of a pet peeve ... rogue toe hair! I LOVE the little cat-foot look on a Sheltie, and just cringe when I see the fly-away slipper feet. Not only is it not very attractive, but I worry that the overgrown hair on the bottom of the feet will not allow the dog to have proper traction for running around on smooth flooring.

So a great big "thank you" to Brenda for showing me how to trim those cute little cat feet!

I've had other people ask me how I keep the boy's feet looking so cute, so now I finally have a place to post the details!

I like to keep things cheap and simple. No fancy high priced tools for me. Here is the equipment you will need ...1) scruffy feet
2) a cheap battery operated razor (I use a lady's personal razor, $20 at your local drug store)
3) a small slicker brush
4) a small pair of blunt nosed scissors
5) a pair of thinning shears (You can get the professional ones for upwards of $100, or a cheap pair that works just as well for $15 from a drug store)

Step 1
I trim the hair on the bottom of the feet with the battery operated razor. Don't dig in between the toes as that can cause irritation. Just trim the hair even with the pads.


Step 2
With the slicker brush, brush the hair on the top of the paw backwards so that it stands up.


Step 3
With the thinning shears, trim the standing up hair short. Go slow until you get the hang of it as you can pinch the skin.


Step 4
With the blunt nosed scissors, trim the hair around the edge of the pads and the nails. I like to trim around the outside of the pads following the same curve that the pad makes. For the outside nails, trim the hair straight down towards the ground. For the middle toes, trim the hair straight across. The hair between the middle toes can be tricky to shape, so that might take some practice. I tend to trim it just slightly shorter than the hair surrounding the nail. That way the overall shape of the paw looks round instead of elongated.


The finished product! I find that once the dog is standing, things shift a bit so you may want to trim some fly-aways once they are standing, even out the edges, etc. In the below picture, the foot on the left is trimmed while the right is untrimmed. I keep their feet done up, trimming once a week, so the difference isn't all that noticeable.


The back feet are slightly more obvious.

Hobbit foot ...


Tidy foot ...


Other entries that I have written on how I groom my Shelties:
Grooming those Sheltie feet
Trimming Sheltie leg feathers and hocks
Trimming Sheltie ears
Homemade snood to prevent messy, broken hair
Copyright & Link Restriction

Please do not use any text or images from this blog without expressed permission of the blog owner. If you are a organization, group, community, commercial site, are acting on behalf of a commercial site (sponsored by them), or are trying to build an audience for any site with the intent of financial gain, YOU MUST obtain permission from the blog owner BEFORE reproducing or copying any material from this site, or embedding this blogs feed into your own site.